Open topic with navigation
Create Rooms and Locations
Now comes the critical step that will fulfill the goal of allowing quick and easy communication and tracking for all age groups. Rooms & Locations will also allow you to use Check-in to take attendance.
To create Rooms & Locations
- Click Ministry > Activity/Room Setup > Rooms & Locations. The Add/Edit Room, Location, Class form appears. Ensure the Middle School activity is displayed before you begin completing the open fields. If the activity is not displayed, check the Ministry selection at the top of the screen and the Show activity drop-down at the bottom of the page.
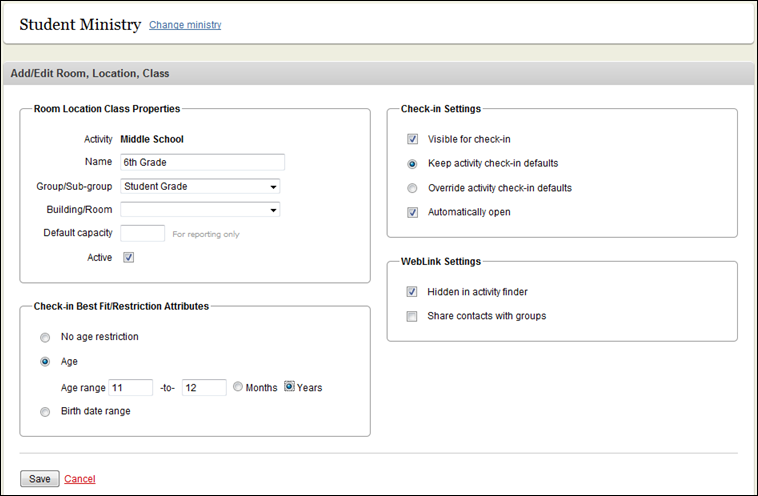
- In the Room Location Class Properties box, type 6th Grade in Name field.
- Select Student Grade from the Group/Sub-group drop-down list.
- In the Check-in Best Fit / Restriction Attributes box, select the Age option. Type 11 to 12 and select Years.
 Your screen should look like this

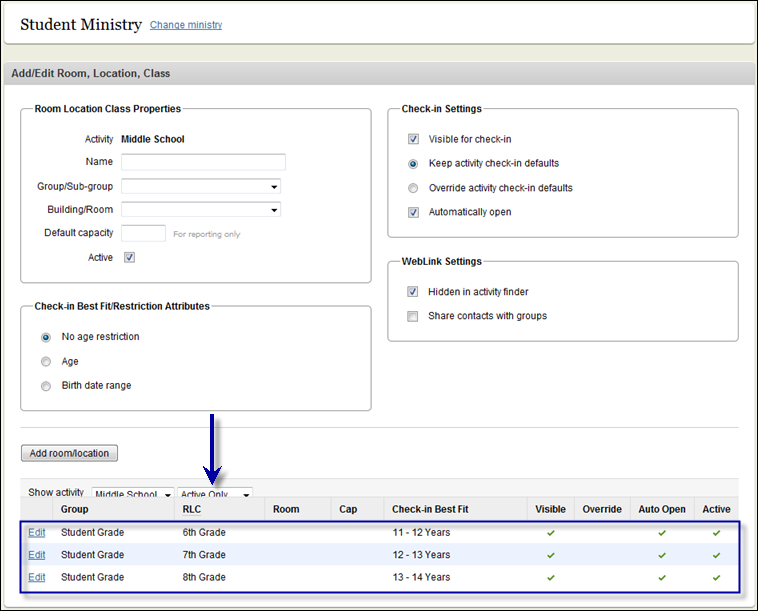
- Click Add Room/Location.
- Repeat steps 1-5 for grades 7 and 8.
 Your screen should look like this

- Finally, add a room for your Check-in Volunteers. Select Volunteers from the Group/Sub-group drop-down list. Select the Age option and type 21 to 100 and select Years. Click Add room/location.
- Select the High School activity from the Show activity drop-down list at the bottom of the page.
- Repeat steps 2-7 for 9th - 12th grades. Add a Check-in Volunteers room for your High School volunteers remember to select the Volunteers option in the Group/Sub-group drop-down list..
Go to next step
![]() Your screen should look like this
Your screen should look like this![]() Your screen should look like this
Your screen should look like this![]() Your screen should look like this
Your screen should look like this![]() Your screen should look like this
Your screen should look like this